How to add an automation to a pack
PavMayson
Posts: 23
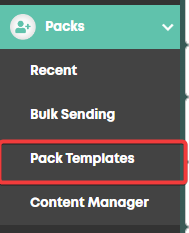
From the Packs menu, select "Pack Templates" and open the template you want to create the automation for.
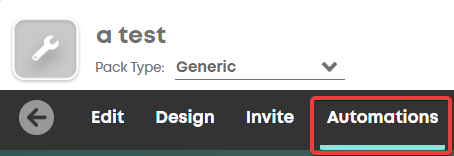
Click on the automations tab to view automations set up for that pack.
Creating an automation
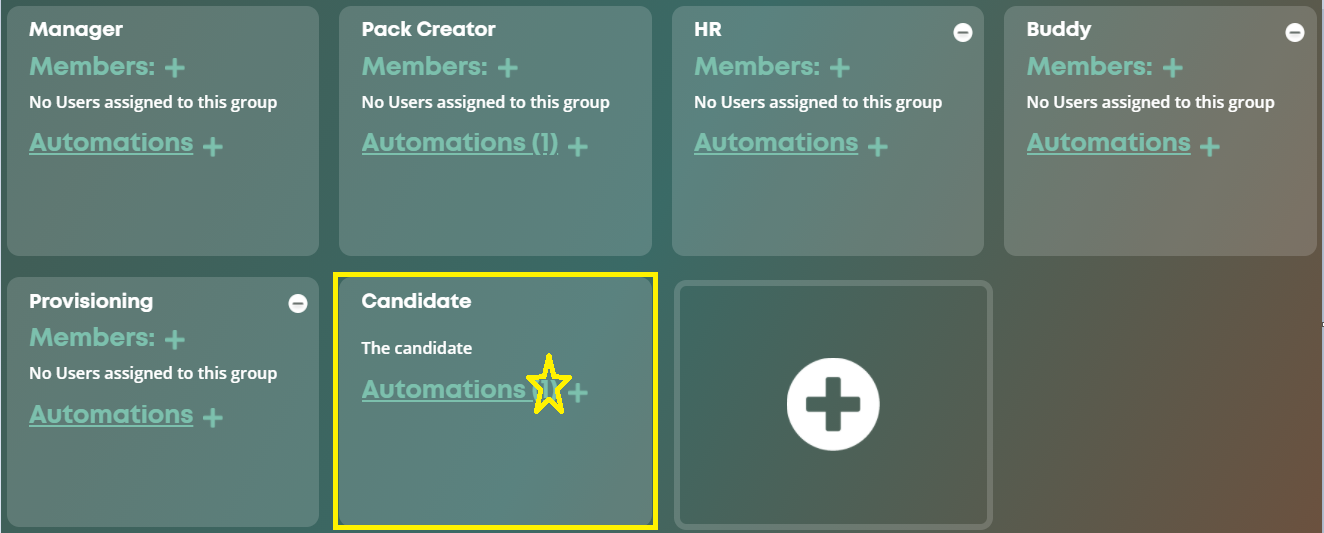
Then select the type of user you would like to set the automation up for, I'm going to use the candidate for the purposes of this example. So click on the word automation in the candidate section as shown in the screen shot below.

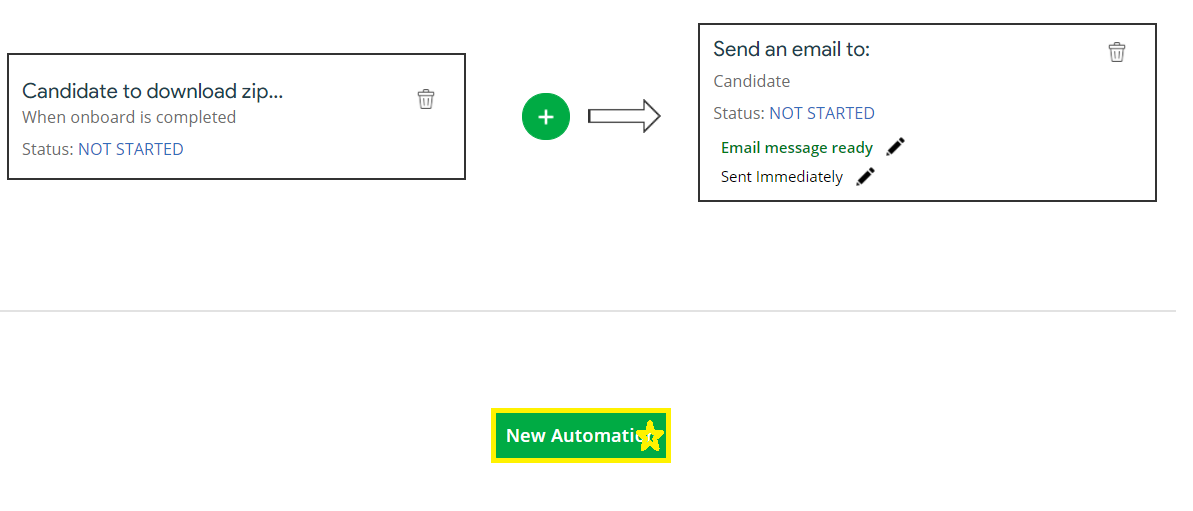
Then for this example we will create a new automation, so we will click the new automation button shown in the screen shot below.
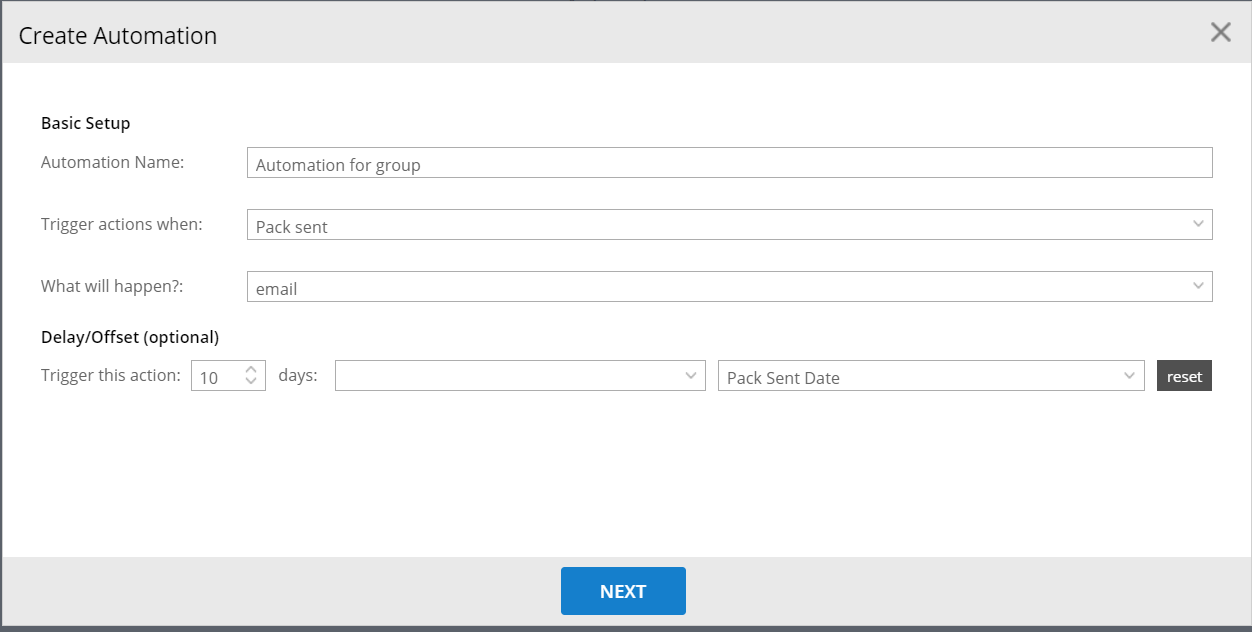
Then we will set up the automation: In the screen shot below I've set up an example automation which will be sent 10 days after the pack completion date. When you're done setting up the automation click next.

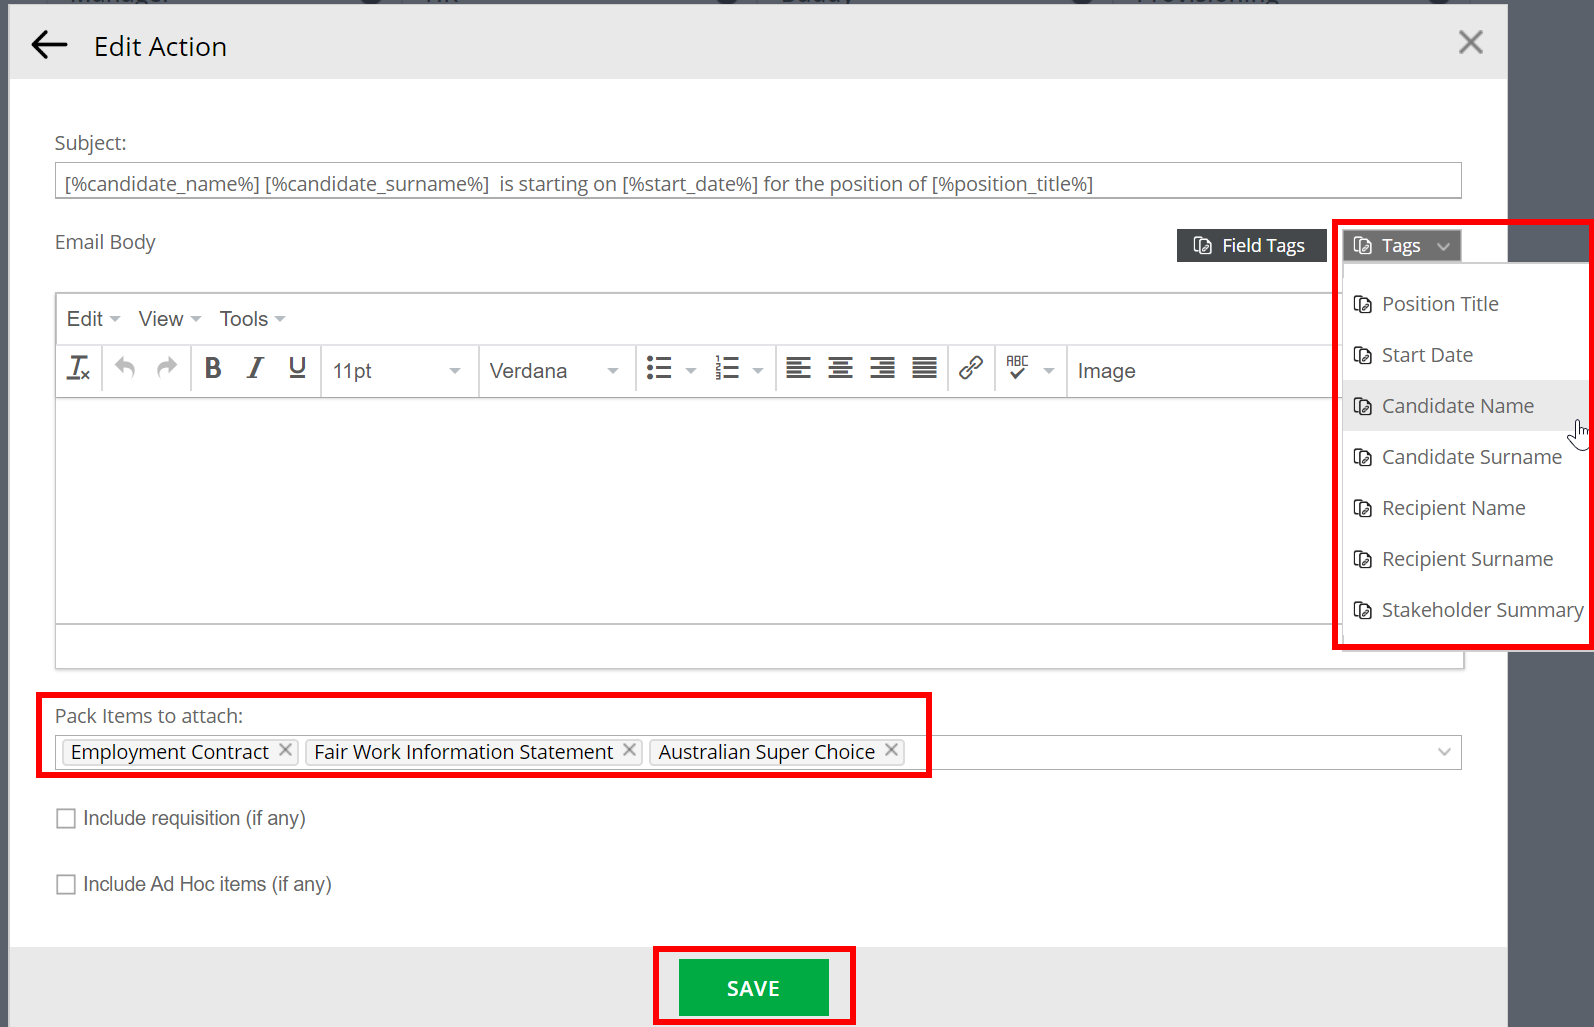
Construct your email using the text editor provided. Tags for the most relevant fields are included under "Tags" and all other fields are searchable from the "Field Tags" button. Optionally, you can also attach completed items from the pack using the dropdown list at the bottom. Hit save when you're done.
Adding automation members/recipients
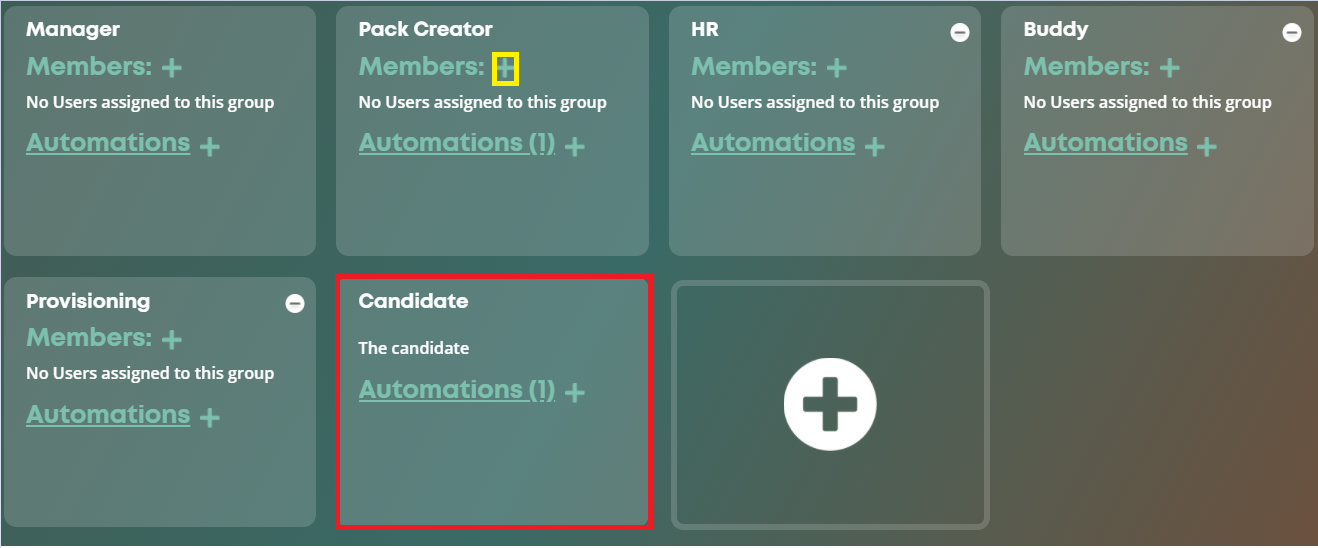
Finally, ensure you have added the correct members to the automations, navigate back to where you can see all the automations groups. (For the candidate automation you can't add additional members to that automation since it's intended solely for the candidate). For instance, if I wanted to add a member to the Pack Creator automation, I would click the plus icon as shown in the screenshot below.
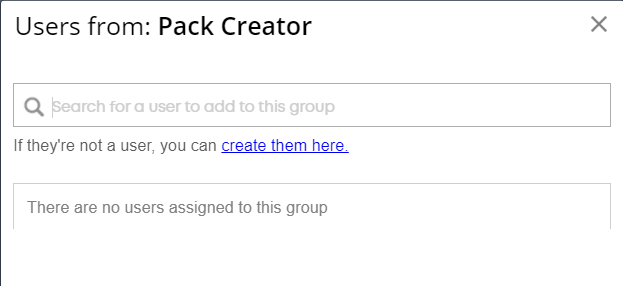
Then you will have the option to add in any members/users you might need to the automation, see screenshot below.
Note that automations can be set on both a pack template basis, and for an individual pack instance i.e. you can create an automation for a specific candidate's pack.

Click on the automations tab to view automations set up for that pack.

Creating an automation
Then select the type of user you would like to set the automation up for, I'm going to use the candidate for the purposes of this example. So click on the word automation in the candidate section as shown in the screen shot below.

Then for this example we will create a new automation, so we will click the new automation button shown in the screen shot below.

Then we will set up the automation: In the screen shot below I've set up an example automation which will be sent 10 days after the pack completion date. When you're done setting up the automation click next.

Construct your email using the text editor provided. Tags for the most relevant fields are included under "Tags" and all other fields are searchable from the "Field Tags" button. Optionally, you can also attach completed items from the pack using the dropdown list at the bottom. Hit save when you're done.

Adding automation members/recipients
Finally, ensure you have added the correct members to the automations, navigate back to where you can see all the automations groups. (For the candidate automation you can't add additional members to that automation since it's intended solely for the candidate). For instance, if I wanted to add a member to the Pack Creator automation, I would click the plus icon as shown in the screenshot below.

Then you will have the option to add in any members/users you might need to the automation, see screenshot below.

Note that automations can be set on both a pack template basis, and for an individual pack instance i.e. you can create an automation for a specific candidate's pack.
Howdy, Stranger!
In order to sign into the forum, please log into your MyRecruitment+ account and find the forum link under the help menu to automatically log into your forum account
Quick Links
Categories
- 186 All Categories
- 9 WEBINARS
- 9 General webinars
- 14 GENERAL / ADMINISTRATION
- 14 General Admin - 'How to' guides
- 3 ORGANISATIONAL CHART
- 3 Org chart - 'How to' guides
- 7 REQUISITIONS
- 7 Requisition - 'How to' guides
- 11 JOBS AND POSTING
- 11 Job posting - 'How to' guides
- 7 CANDIDATE PROFILE
- 7 Candidate profile - 'How to' guides
- 13 FORMS AND FIELDS
- 13 Forms and fields - 'How to' guides
- 49 RECRUITMENT WORKFLOWS
- 4 Recruitment workflows - 'How to' guides
- 1 Recruitment Questions
- 34 Recruitment Tutorials
- 1 VIDEO INTERVIEWING
- 1 Video Interviewing - 'How to' guides
- 3 REFERENCE CHECKS
- 3 Reference checking - 'How to' guides
- 33 PACKS
- 16 Packs - 'How to' guides
- 12 Onboarding Tutorials
- 2 Onboarding Questions
- 2 REPORTING
- 2 Reporting - 'How to' guides